Showing posts with label dessert. Show all posts

Sunday, November 20, 2011

The Real Sugar Plum


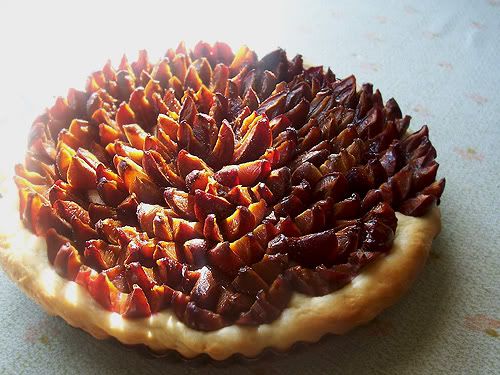
I am a big proponent of traditional foods on holidays, but I always try to add in some new things here and there to make it interesting.  If the thought of having only the same pies for Thanksgiving this year makes you feel like you're stuck in a rut, give this plum cake a try.  Not only is it still very fallsy, but it's refreshing, surprisingly light and can be prepared a day in advance.  In fact, it's actually better the next day.

Coming from a German background has given me a great appreciation for "peasant" fare; hearty, simple, and using the foods available during the season.  This is one of those type of dishes.  The plums that are used for this dish are called Italian prune plums in the few stores that I've been able to find them in here, but where I come from in Germany (Rheinland-Pfalz) they're called Quetsche and they are a staple fruit during the tail end of summer and throughout fall.  My Opa used to make Slivovitz, a Slavic plum brandy, with them and my Oma made Latwerg, an extremely thick plum butter that needed to cook for three days.  My mother and I still make the Latwerg, but sadly we never did get to see my Opa make the Slivovitz.  On the day of my graduation my mother presented me with a bottle that he had put up the year I was born.  It was amazing....but could burn the hair off a rhino at 20 paces.  The only one brave enough to have a second shot straight after the first was my sister, and she couldn't speak above a hoarse, raspy whisper for a few hours afterward.   I don't think I have ever mentioned this before, but I am so glad I have the heritage that I do, it is amazing.

This recipe makes three 10 inch cakes so adjust according to your needs.

Quetschekuche
dough (adapted from a recipe in The Best Of Baking):
1/2 cup sugar
1 cup warm milk
2 packages active dry yeast
4 2/3 cups flour
1 teaspoon salt
8 tablespoons butter, melted and cooled
4 eggs
canola oil

topping:
9 pounds Italian prune plums
granulated sugar

For the dough:
Mix sugar and yeast with warm milk (between 110 and 115 degrees) and set aside to proof for 5 minutes.  Meanwhile, at the Hall of Justice....uh, oops, this isn't my Useless Superheros slash page....mix flour and salt together in a large bowl.  Heat oven to 220 degrees and turn off heat.  Stir cooled butter and eggs into yeast mixture and pour liquid ingredients over flour mixture.  Bring together into a ball, adding flour if too sticky.  I made this on a fairly humid day and ended up adding about another 3/4 cup of flour before a nice soft dough was achieved.  Knead briefly into a smooth ball.  Place ball in an oiled bowl, spread a little oil on the top, cover with plastic wrap and put dough into preheated oven to rise.

For the topping:
While the dough is rising it's time to get your plums prepared.  I forgot to take pictures of this process so I'll try to explain it for anyone who has never done it like this.  Hold the plum with the stem side up, seam towards you.  Using a sharp paring knife cut along seam until the plum is cut down one half.  Carefully open, like you would a book, without tearing uncut half.  Slide the tip of the paring knife between one side of the pit and the plum if it doesn't want to come loose on its own.  Remove pit.  At stem end, cut about a third of the way down on the uncut side to more easily open the plum.  Make two slashes about a third of the way down on each plum half to produce the characteristic points seen in the picture.  Repeat with remaining plums.

Lightly grease three round 10 inch tart pans.  Remove risen dough from oven and preheat to 350 degrees (if you are using dark tart pans, reduce the heat of your oven to 325).  Punch down dough and separate into thirds.  Press each third evenly into each of the tart pans.  Starting from the outside, lightly press prepared plums into dough in concentric rings, points facing up.  Sprinkle liberally with sugar.  Bake for 25 to 30 minutes, or until dough is golden and plums are a little wilted.  And don't worry if you have a "plum juice puddle", it's perfectly normal.  It will be reabsorbed by the plums as well as the now golden dough without making the cake soggy.  Sprinkle a little extra sugar over the plums as the cakes cool.  Cool completely and serve at room temperature. 

Thursday, November 17, 2011

π


After a few months of taking care of too much stuff in real life, I am finally back to post more recipes and occasionally talk about World of Warcraft (just to put it out there, I hate Baleroc).

Thanksgiving is right around the corner and as we have done the past few years, we're going to celebrate with my BFF Jill and her family.  This means copious amounts of food and Harry Potter.  This year's Harry Potter aspect will consist of watching The Deathly Hallows.  Though it hasn't been mentioned, I'm pretty sure it'll be a viewing of both parts.

The food aspect is much more involved.  Both April and I do the cooking and this year's list is staggering; turkey, turkey gravy, turkey noodles, ham, dressing, mashed potatoes, sweet potatoes, potato salad, roasted asparagus, corn, cornbread biscuits, cranberry relish, and anything else that April added to her stuff that I didn't have on my Big List.  And those are just the things for dinner.  We're also doing appetizers and desserts.

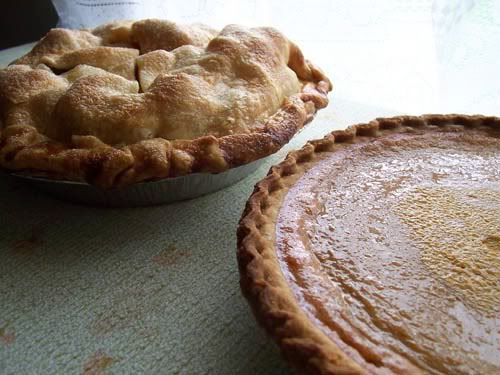
With desserts come the pies.  This year I'll be making pecan pie, chocolate tart pie, and the ever ubiquitous apple pie and pumpkin pie.  Today I'm going to share the recipes that I use for these last two because the apple pie is, well, perfect, and I finally perfected the pumpkin pie (which was quite by accident).

Old-Fashioned Apple Pie (From Martha Stewart Living, November 2005)
4 pounds cooking apples, peeled, cored and cut into wedges
3 tablespoons lemon juice
5 tablespoons flour
1/2 cup sugar
1 1/4 teaspoons ground cinnamon
1/4 teaspoon ground nutmeg
1/4 teaspoon salt
1/4 cup unsalted butter, cut into small cubes
1 egg yolk
1 tablespoon half and half
sugar, for dusting

Preheat oven to 400 degrees.  In a large bowl toss apple wedges with lemon juice and set aside.  In a small bowl mix together flour, sugar, cinnamon, nutmeg and salt.  Sprinkle flour mixture over apples in thirds, tossing after each addition.  Fill one deep dish or two regular 9-inch pie shells evenly with apple mixture; dot evenly with butter.  Whisk together egg yolk and half and half, brushing rim of pie crust.  Take top crust and drape over filled pie shell.  Brush top of crust with egg wash and press over hanging crust up to form a rim.  Cut four slits into the top crust to allow venting.  Sprinkle top with sugar.  Bake pie for 20 minutes at 400 degrees and then turn heat down to 350 and bake for a further 35 minutes. 

Pumpkin Pie
1 - 4 pound sugar pumpkin, roasted and flesh mashed*
3 large eggs
1 1/4 cups packed brown sugar
3/4 teaspoon salt
1 teaspoon ground cinnamon
1 teaspoon ground ginger
1/4 teaspoon ground nutmeg
3/4 teaspoon pure vanilla extract
1 cup heavy cream

Preheat oven to 350 degrees.  In a large bowl carefully whisk together all ingredients listed until thoroughly combined.  Pour mixture evenly between 2 deep dish pie shells.  Bake for 35 to 40 minutes or until centers are almost set.  Cool completely before serving.

Just as a side note, I did not make my own pie crusts.  I used frozen deep dish crusts for each pie and then picked up a package of rolled pie crust for the tops of the apple pies.  I'm just like that sometimes, and pie crust and I have never really seen eye-to-eye in the first place.  You can make your own, if you're so inclined.

*You can use 4 cups of the canned solid pack pumpkin in place of the mashed pumpkin, but if you decide to mash it yourself, here's how to do it:  Cut the pumpkin in half with a large knife.  Scoop out seeds and place halves cut side down onto a tinfoil lined baking sheet.  Roast in a 350 degree oven for about an hour to an hour and a half.  The outer shells will have a bit of give to them when they are ready.  Remove from the oven and turn cut sides up.  Allow pumpkin halves to cool completely then scoop out flesh and either puree in a food processor or take the less advanced method and mash it with a potato masher.  Either one works well. 

Monday, June 27, 2011

Daring Bakers' June 2011 Challenge - From Phyllo to Baklava


Erica of Erica’s Edibles was our host for the Daring Baker’s June challenge. Erica challenged us to be truly DARING by making homemade phyllo dough and then to use that homemade dough to make Baklava. This challenge was easy and hard all at the same time.  

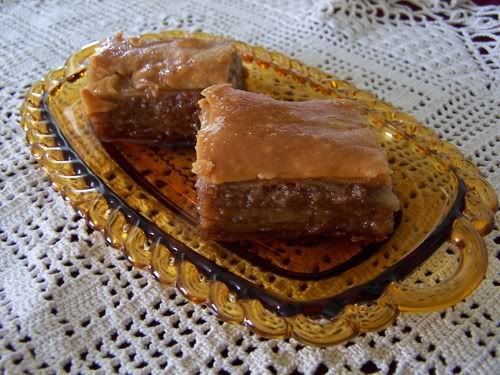
I've been making baklava since I was 13 or 14 years old.  My mother brought home a Greek cookbook that had been translated into English and I was the first one to make it from there.  The rest is history.  Baklava has since become one of my most requested dishes. Given that, I found the challenge easy because I knew what to do, what to expect and what to look for.

The hard part, of course, was making my own phyllo.  Phyllo, for those who don't know, is a paper thin sheet of raw dough.  The commercially produced phyllo can be difficult to work with because it dries out quickly and can crack or tear.  Homemade phyllo has about a hundred more difficulties on top of those.

Let's talk about those, shall we?

Thursday, June 23, 2011

Let Them Eat More Cake


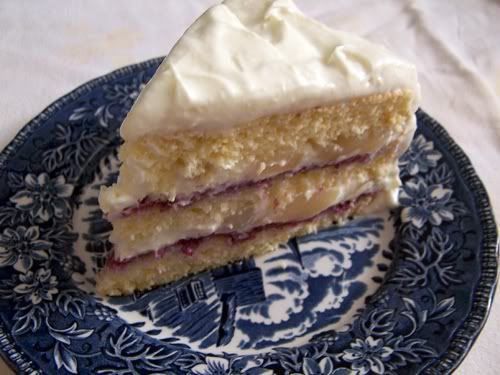
Brendan came home last weekend and a few days before hand Karina had decided he needed a cake since his birthday had been on the 15th.  She leafed through *The Best of Baking (the one cookbook we couldn't live without) and hit upon their Pear Cream Gateau because it had a nice light whipped cream instead of heavy butter cream.  It's as hot as the Sun here and with the added beauty of high humidity, the heat index is the like standing on Rigel.  Just saying butter cream made us both feel sluggish.  Plus, pears...pears are juicy, bright, and just the right sweetness for hot weather.

Back to the recipe.  It called for a chocolate cake to be made, which Karina nixed right off the bat.  She was unable to match chocolate with pears in her mind.  No problem, I said, I'll just make a regular sponge.  Then I started getting out all the ingredients I'd need otherwise, only to find I didn't have any blueberry preserves (which she wasn't too chuffed about either...pears, blueberries and chocolate do not live together in her culinary world), so I pulled out black currant preserves instead.  I whipped up the cake, put it in the oven and went to whip up the cream with a little powdered sugar.  As I was pulling the cream out of the fridge, I spotted a package of cream cheese and my brain said, "oh yeah, that dog'll hunt."  I pulled it out, softened it in the microwave, added some powdered sugar and extracts, and folded the whipped cream into the whole mess.

Which is how we ended up with a cake that merely resembled the original because it had pears in the filling.

Pear Cream Cake
sponge:
6 eggs, separated
4 1/2 tablespoons lukewarm water
2/3 cup sugar
1 3/4 cups cake flour, sifted
1 1/2 teaspoon baking powder
1/8 teaspoon salt
1 teaspoon grated dried orange peel

filling and frosting:
2 15-ounce cans pears, drained with juice reserved
2/3 cup black currant preserves
2 cups heavy cream
1/4 teaspoon brandy extract
1/4 teaspoon pure almond extract
12 ounces cream cheese, room temperature
1 - 1 1/2 cups powdered sugar

Grease a 9-inch springform cake pan.  Preheat oven to 365 degrees**.

Place the egg yolks, water and half the sugar in a medium bowl.  Beat with an electric mixer for 5 to 10 minutes or until pale and creamy.  Beat the egg whites until stiff and fold in remaining sugar.  Carefully fold egg white mixture into egg yolk mixture.  Sift together the flour, baking powder and salt, then stir in the dried orange peel.  Fold flour mixture into egg mixture.  Turn the batter into the prepared pan.  Smooth the surface and bake for 30-35 minutes or until a wooden pick inserted in the center comes out clean.  Cool slightly in the pan and then turn out onto a rack to cool completely.  Wrap in plastic and allow to stand overnight before cutting into layers.
 
Dice the pears in 1/2 inch pieces and set aside.  In a medium bowl whip the heavy cream together with the extracts until moderately stiff peaks form, adding powdered sugar to taste near the end.  Stir together cream cheese and powdered sugar to taste in a large bowl until smooth.  Carefully fold heavy cream into cream cheese until blended.  Reassemble the cleaned springform pan used to bake the cake. Cut the cake into three layers and place one layer into the bottom of the pan.  Sprinkle evenly with several tablespoons of the reserved pear juice.  Spread the layer evenly with half of the currant preserves and then with 1/4 of the cream mixture.  Sprinkle half of the diced pears evenly over cream.  Top with the second layer and repeat.  Sprinkle the third layer with several tablespoons of the reserved pear juice before placing on top.  Cover cake with plastic wrap and refrigerate, along with remaining cream, for 2 hours or until cream is set.  Carefully remove the cake from the pan and place on cake plate.  Frost with remaining cream.  You can get creative with piping and whatnot, but it's not necessary.  Chill for 30 before serving to allow cream to set slightly.
 
This is by far one of the best tasting cakes I have ever made, and I've been making cakes since I was 13 years old.  
 
*There are several cookbooks with this title.  I am referring to the one by Annette Wolter and Christian Teubner any time it is mentioned in any of my posts.
**I used a light colored pan, for a dark colored pan preheat oven to 350 degrees.
 

Monday, June 13, 2011

Coffee makes it possible to get out of bed. Chocolate makes it worthwhile.


Cake is a very touchy kind of thing for me.  See, I'm not a baker (no, really, it's a major weak spot in my culinary skill set).  I can whip up stews and soups and steaks and several other dishes that start with "s" at the drop of a hat, but baking is something that requires a lot of planning and sometimes a few tears.  However, since I have a massive sweet tooth I tend to do it often.  In my world "baking" is synonymous with "sweet".

Back to the cake thing.  I always bake cakes for my kids' birthdays and I let them choose which one they want.  It's easier than making one I think they would want and having it turn out to be one they wouldn't consider if they were starving.  Karina's birthday was a few weeks ago and her choice was chocolate cake with mocha frosting.  So I used the only chocolate cake recipe that has never failed me with a French butter cream icing.  It was tasty as hell, but ugly as sin....I also lack decorating skills.

Chocolate Sponge Cake (adapted from The Best of Baking)
6 eggs, separated
4 1/2 tablespoons lukewarm water
1/2 cup sugar
1 cup all purpose flour
1/2 cup unsweetened cocoa powder
1 1/2 teaspoons baking powder
1/8 teaspoon salt
1 tablespoon very finely ground espresso (optional)

Grease a 9-inch springform cake pan.  Preheat oven to 350 degrees.

Place the egg yolks, water and half the sugar in a medium bowl.  Beat with an electric mixer for 5 to 10 minutes or until pale and creamy.  Beat the egg whites until stiff and fold in remaining sugar.  Carefully fold egg white mixture into egg yolk mixture.  Sift the flour with the cocoa powder, baking powder, coffee and salt.  Fold into egg mixture.  Turn the batter into the prepared pan.  Smooth the surface and bake for 35-40 minutes or until a wooden pick inserted in the center comes out clean.  Cool slightly in the pan and then turn out onto a rack to cool completely.  Wrap in plastic and allow to stand overnight before cutting into layers.

French Butter Cream (adapted from The Best of Baking)
1 1/2 - 2 cups butter, slightly below room temperature
4 eggs
1 cup sugar
1 tablespoon very strong coffee
1/3 cup unsweetened cocoa powder
pinch of salt

Beat the eggs, sugar and salt in a medium bowl set over a saucepan of simmering water until very warm and thickened (I believe the temperature should be around 160 degrees).  Remove the egg mixture from the heat and continue beating until completely cooled.  Beat in the coffee and cocoa powder.  Beat in butter one tablespoon at a time until butter cream comes together smoothly.  If refrigerating butter cream, have it come to slightly below room temperature before using.

Friday, June 10, 2011

Creampuffs....Now With Chemical X


My mother comes from a small German town called Langmeil.  When she married my father and moved to the States she wasn't able to visit home often.  But whenever she did, my Oma's best friend, Frau Sapp (which I've probably spelled wrong), would always make cream puffs for her because they were a favorite treat.  Since I know this tidbit of information I always think of my mother, my Oma, Frau Sapp and Langmeil whenever I have cream puffs.  It's a very happy event.

What is odd about them is though they are incredibly easy to make, I very rarely make them.  Now that I've revisited them I think I'll be making them more often.

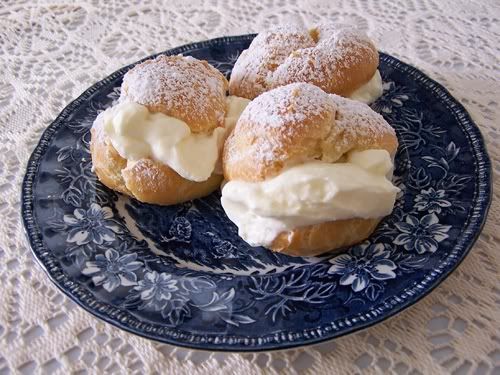
Frau Sapp went with a very simple sweetened whipped cream to fill hers and they were divine.  I went with Chantilly custard and we may have wept while eating them.  "I think the filling could live on it's own in a bowl", were the words of my best friend.  And thus we have found our Chemical X.

Cream Puffs
pate a choux:
1/2 cup butter
1 cup water
1 cup flour
4 eggs
pinch of salt

Chantilly custard:
2 cups whole milk
2 eggs
1/2 cup sugar
3 tablespoons cornstarch
1/2 teaspoon vanilla
pinch of salt
1 1/2 cups heavy cream
1/4 cup powdered sugar

Make the custard for the filling first as it has to cool completely in the refrigerator.  Put the milk in a medium saucepan and scald over medium heat.  In a medium bowl mix together eggs, sugar, cornstarch and salt with a whisk.  Once milk has reached temperature, take a ladleful and slowly whisk it into the egg mixture.  Repeat one more time.  Whisk tempered egg mixture slowly back into the remaining milk in the saucepan and cook until thickened.  Remove from heat, allow to cool for a minute and then whisk in the vanilla.  Pour into a bowl and put plastic wrap directly onto the surface of the custard.  Refrigerate until completely cooled.

Preheat oven to 350 degrees.  Line two backing sheets with parchment paper and set aside.  Bring butter and water to a boil in a medium sauce pan.  Pour the flour and salt into the boiling liquid all at once and mix vigorously with a wooden spoon until mixture forms a ball.  Remove from heat and allow to cool for about 5 to 10 minutes.  Mix eggs into the dough one at a time, making sure to fully incorporate each one.  Mixture should now be like a thick paste and glossy.  Using a two inch ice cream scoop, drop scoops of dough onto the prepared baking sheets, leaving about and inch or so between.  Bake for approximately 30 minutes, or until cooked through and lightly browned.  Cool completely either on the pans or on wire racks.

Complete the Chantilly custard by whipping the heavy cream to soft peaks and then whip in the powdered sugar until stiff peaks are formed.  Fold whipped cream into the cooled custard.  Slash open each puff to create a pocket and either spoon or pipe Chantilly custard into each one.  Dust with powdered sugar and serve.  Though they should be assembled right before serving, leftover cream puffs that have been stored in the refrigerator taste awesome as well.


Monday, May 23, 2011

Diamonds are a Girl's Best Friend


Best friends are awesome.  My best friend, April, is more awesome than most in my opinion.  No matter what, and I really do mean "no matter what", she has been and always will be there for me.

We try to get together once a week to sit around, talk and on occasion write on our perpetually changing book.  More often than not we meet up at my place which means that I get to cook up a storm for the two of us and we eat such things as red curry chicken and spaghetti bolognese at 9 o'clock in the morning.  If I can swing it, I really like to make something desserty to go with the meal.  Because how could that possibly be a bad thing?

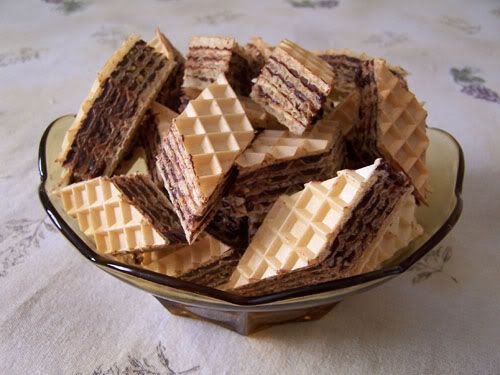
Last week I made the beauties you see above.  In Serbian/Bosnian (Yugoslavian for me) they're called oblatne.  My oma, who was German by way of Hungary, called them oblaten, though strictly speaking oblaten in German are exceptionally thin edible wafers that go under cookies such as lebkuchen so that they don't stick to the pan when baking.  The treats above are wafer cookies that are very simple to make.  The wafers themselves come in packets of five and just about any filling that is spreadable can be put between them.  That's the only "hard" part, figuring out what you want to put in between; Nutella, pastry cream, peanut butter and jelly, marshmallow creme, et al.  The fillings that I know are the ones that my oma and mom made to put inside, chocolate with nuts and lemon with nuts.  I opted for the chocolate because Karina isn't chuffed with lemon and I knew April would not have any objection to anything with chocolate.

I got the recipe from my mother when we were up at her place for Christmas, she also gave me the packet of wafers, which she bought when she was in Germany.  They can be bought here in the states in stores specializing in Eastern European or German foods, or on the internet.  The internet option may be more viable if your local specialty store runs out of them as fast as they get them in, like mine.

Chocolate filled Oblaten
1 packet 18" x 11" (47cm x 29cm) wafers

filling:
6 eggs
2 1/2 cups powdered sugar
3/4 pound unsalted butter, room temperature
12 ounces bittersweet chocolate, chopped
1 1/2 cups nuts, finely ground (I use pistachios this time)

In the top of a double boiler whisk together eggs and powdered sugar until thick and pale yellow, and mixture reaches 160 degrees.  Remove from heat, add in butter and chocolate, and stir until completely incorporated.  Stir in ground nuts.  Mixture should be room temperature by this point, if not allow to cool to room temperature.  On the first wafer, smooth side down, spread 1/4 of the mixture evenly and thinly.  Place a second wafer on top with the smooth side down.  Spread 1/4 of the mixture over the second wafer and repeat two more times with remaining mixture and wafers.  Put plastic wrap on the top wafer and then lightly weigh down finished oblaten with a board.  Let oblaten sit for approximately 8 hours or over night.  Using a sharp knife trim ends from oblaten, cut into 2 inch strips using the wafer pattern as a guide, and then cut strips into diamonds or rectangles.

Tuesday, May 17, 2011

Devil in a Red Dress


Karina and I watched Throw Down with Bobby Flay over the weekend (we're not masochists, I swear) and Karina practically drooled when the cupcake throw down came on.  This rocker chick made red velvet cupcakes and I'm pretty sure Karina whimpered.  So I did a bad thing and said "hey, I can make those for you if you want".  To which she said "how about right now?  is right now good?".  And as you may have guessed already, I said "why yes, I can".  

Now, I, personally, am not fond of red velvet cake in general because every one I've ever tried tasted like a chemistry set.  But people on the show raved about these and I could tell that Karina really, really, really wanted to have one of them.  I searched up the episode and was happy to see a link to the recipe.  The only problem was, when I read the recipe I kind of urped in my mouth a little bit.  The amount of red food coloring was insane (2 1/2 tablespoons) and the amount of cocoa spartan (1 1/4 teaspoons).  The recipe for the frosting made my teeth hurt just reading it (2 pounds powdered sugar).  The only thing I could do was adjust the recipe to better suit what I thought should be in them.  

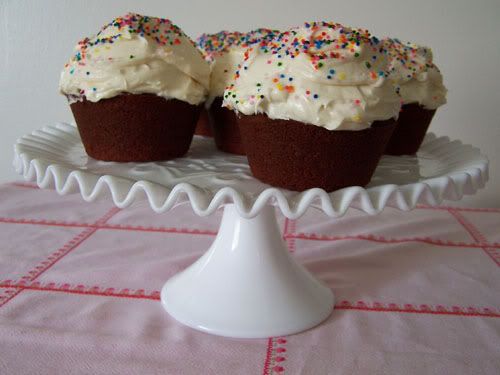
What I came up with wasn't a true red velvet cake, and since I added more cocoa it was leaning more toward devil's food, but still not quite that either.  Whatever you want to call them, they were amazing and delicious and I will certainly be making them again.

Red Devil Cupcakes
cupcakes:
2 1/4 cups flour
1 teaspoon baking soda
1/4 teaspoon salt
1/3 to 1/2 cup cocoa
1 cup sugar
3/4 cup buttermilk (I didn't have any buttermilk so I did the vinegar in the milk trick)
3/4 cup vegetable oil
2 eggs
1 teaspoon vanilla
1 to 2 teaspoons red food coloring

frosting:
8 ounces cream cheese, room temperature
1/2 cup unsalted butter, room temperature
1 teaspoon vanilla
pinch of salt
2 cups powdered sugar
sprinkles

Preheat oven to 350 degrees.  Grease, or line with muffin papers, a 12 cup regular cupcake pan or a 6 mega-cup cupcake pan (I have no idea what that is actually called, suffice it to say it's a cupcake pan that makes overly large ones). Mix dry ingredients for cupcakes together in a bowl.  Stir together wet ingredients in another bowl until well blended.  Add the wet mixture into the dry mixture and stir together until just combined.  Divide batter evenly in the cupcake pan.  Bake approximately 20 minutes, or until a toothpick inserted in one of the middle cupcakes comes out clean.  Cool in pan for 10 minutes and then transfer cupcakes to a wire rack to cool completely before frosting.

To make the frosting, cream together cream cheese, butter, vanilla and salt in a medium bowl with an electric mixer.  With the mixer on low, add the powdered sugar in small increments until fully combined.  Frost the cooled cupcakes and decorate with sprinkles.  

Monday, March 14, 2011

Everybody love parfait!


Most people have some sort of sweet offering that they enjoy above all others.  My daughter's happens to be tiramisu....but I don't make it as often as she would like.  Mostly because mascarpone is a bit difficult to find and when I do find it, it costs an arm and a leg or it's in a container the size of a water cracker.  I have made it a few times with substitutions for the mascarpone, however the dishes have always lacked the richness that only mascarpone provides.  Lucky for Karina (and myself and Bren) Kroger had mascarpone on sale the other week and I was able to pick up 2 pounds for ten bucks.  I was thrilled.  

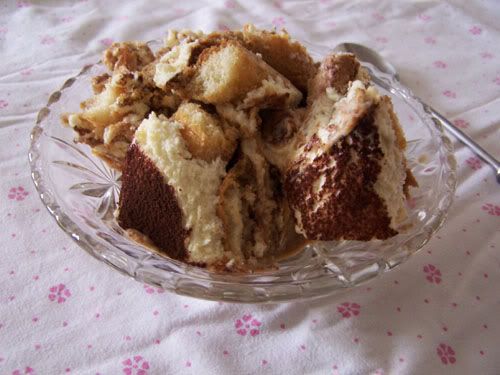
Now, I admit, my tiramisu is NOT pretty.  I don't make it in one layer in a rectangle dish. I use the English trifle method, many layers in a tall round dish.  Ugly when dished up, but the cream to cookie ratio is perfect.  


Tiramisu (THIS RECIPE CONTAINS RAW EGGS)
base recipe:
2 pounds mascarpone
4 eggs, separated
3/4 cup sugar, plus 4 extra tablespoons
1 cup strong espresso
1/4 cup kaluha, madeira, Irish cream or other tasty liquor/fortified wine
1 packet Italian ladyfingers (savoiardi)
unsweetened cocoa
pinch of salt

optional (added to the tiramisu in the picture):
1/2 pound cream cheese, softened
1 pound whole milk ricotta
1/2 cup sugar
3/4 to 1 cup Amaretto
1 cup strong espresso
1/2 cup kaluha, madeira, Irish cream or other tasty liquor/fortified wine
3 tablespoons rosso sweet vermouth
1 packet Italian ladyfingers (savoiardi)

Beat the egg whites until soft peaks form; add the 4 tablespoons of sugar and beat until stiff peaks form and set aside.  Beat the egg yolks, 1 1/4 cups sugar and pinch of salt until thick and pale yellow.  Beat in the mascarpone until well combined.  Repeat with the cream cheese and ricotta.  Add 3/4 cup Amaretto and mix thoroughly.  Taste.  If needed, add another 1/4 cup Amaretto.  Fold egg whites into mascarpone mixture and set aside.  Mix together espresso, Irish cream and vermouth, pour some into a shallow dish large enough to accommodate one of the savoiardi without it breaking.  

Assembly:  soak savoiardi one at a time in the espresso mixture and use them to line the bottom of a large, high-sided bowl.  Add a layer of the mascarpone cream and smooth evenly.  Dust the top of the cream with unsweetened cocoa powder.  Repeat this until bowl is full and/or the last layer of cream has been added.  Dust top with unsweetened cocoa powder and set dish in refrigerator for several hours.  This allows the flavours to meld and the savoiardi to soften.  Serve at room temperature for best taste.

I've given directions for the embellished version that I made and is pictured, adjusting for a base recipe should be easy from there.  And just a couple of notes:  1) don't use fresh ladyfingers, use the ones called savoiardi, they don't disintegrate when soaking in the espresso mixture and maintain their shape when softened; 2) what liquor(s) you use is entirely up to you, I don't care what any other recipes say, if you don't like the liquor on its own you won't like it in the dessert; 3) using raw eggs is also up to you, should you not want to you can beat the egg whites in a double boiler until stiff peaks form and the temperature reaches 160 degrees, ditto with the egg yolks.

Sunday, September 19, 2010

Blue Monday

 
from http://iharthdarth.livejournal.com/

Last week my daughter was having a particularly bad day and I wanted to cheer her up with something warm, hearty and homey.  I scanned the shelves and bins in my kitchen for a while, finally settling on a favourite of both hers and mine; pinhead oatmeal.  As I moved the bag of oatmeal out I saw behind it a bag of spelt flour we had bought some time ago, intending to find wonderful things to do with this ancient species of wheat.  Seeing it again made me think about that and I had an overwhelming urge to use it.  I ended up searching the internet for recipes containing spelt and was happy as a clam when I saw that one of the links was to a category for spelt over at 101 Cookbooks, a blog I use to read quite often when I had my previous cooking site.

After a quick glance at the list, I hit upon her Rosemary Olive Oil Cake.  It sounded delicious as written, but I knew I wanted to modify it to suit our tastes more.  Despite the driving force to make this being my daughter's bad day, I have yet to see my youngest son refuse cake of any kind and wanted to include him as a recipient as well.

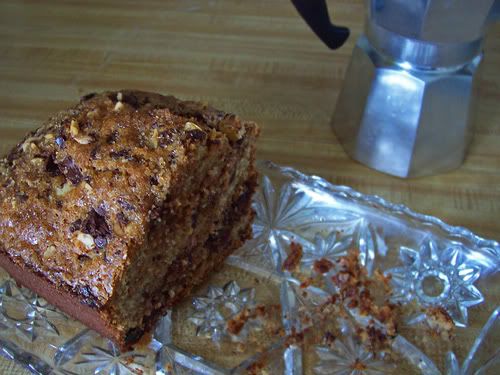
What I came up with for us didn't include rosemary, but did include homemade granola.  And oh wow, was this cake fantastic.


Blue Monday Cake
Dry Ingredients
1 cup spelt flour
1 1/2 cups all purpose flour
1 1/2 cups toasted granola
1 cup sugar
1 1/2 tsp baking powder
3/4 tsp salt

Wet Ingredients
3 eggs
1 cup extra virgin olive oil
1 cup whole milk

7 ounces dark chocolate with hazelnuts, chopped
2 tbs demerara sugar


Preheat oven to 350 degrees.  Grease a 3 inch deep 9 x 5 loaf pan and line the bottom with parchment paper.  Mix dry ingredients together with a whisk in a medium bowl and set aside.  Whisk eggs in a large bowl until homogeneous, then whisk in oil and milk.  Fold the dry ingredients into the wet until just combined.  Fold in 2/3s of the chopped chocolate.  Pour batter into prepared pan.  Sprinkle the top with remaining chopped chocolate and press into dough very lightly with the back of a spoon.  You want the pieces to be on top, but not to fall off when the cake comes out of the oven.  Sprinkle the demerara sugar over the top of the batter.  Bake for approximately 1 hour, or until golden and a metal skewer inserted into the middle comes out clean.  Cool briefly in the pan, then remove to cool on a rack.  Serve while warm, if possible, or at room temperature. 

Friday, May 21, 2010

mmmmm....Gibbs......


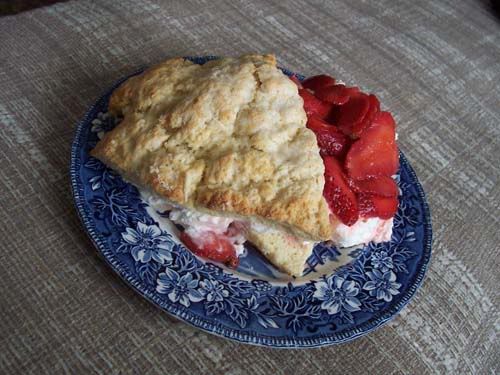
When we were growing up, my mom would go through stages of food and we would eat a specific food type or group for weeks on end. One of those that happened when we were living in sunny California was bread. All different kinds of bread, including homemade pita and one that I fell in love with, scones. Like a biscuit, but richer and sweeter, I just couldn't get enough of them. Anyway, when I decided to make strawberry shortcake the other day I really wasn't looking forward to the hohum biscuit cake that is usually the base for this dessert. That's when I remembered scones. Oh yeah, that dog'll hunt.

Strawberry Shortcake
6 scones, warm or room temperature
2 lbs strawberries
1/3 cup granulated sugar
1/4 cup Marsala or other fortified wine (optional)
2 cups heavy cream
powdered sugar, to taste

Hull and slice the strawberries. Mix them together in a bowl with the granulated sugar and Marsala (if using). Allow to macerate for at least an hour. Whip the heavy cream with powdered sugar to taste. Split the scones in half, slather bottom half with whipped cream and spoon over strawberries with juice. Top with the other half of the scone. Enjoy.


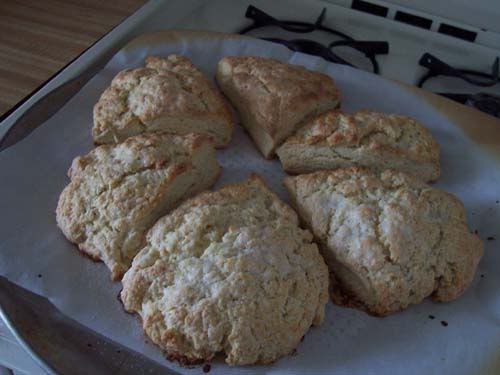
About those scones my mother use to make, I never did write down the recipe for them. And then I received as a gift Biscuits and Scones by Elizabeth Alston. The book has a plethora of amazingly delicious recipes that I've made...and it has a recipe for ordinary scones that taste exactly like the ones my mother use to make. Divine.


Simple Sweet Scones (Biscuits and Scones, Elizabeth Alston)

2 1/2 cups flour
1 tbs baking powder
1/2 tsp salt
8 tbs cold unsalted butter, cut up
1/4 - 1/3 cup sugar
2/3 cup milk
1 egg white
sugar

Heat oven to 425 degrees. Put flour, baking powder and salt into a large bowl; stir to mix well. Add butter and cut in with a pastry blender or rub in with your fingers, until mixture looks like fine granules. Add sugar; toss to mix. Add milk and stir with a fork until a soft dough forms. Form dough into a ball, put onto a lightly floured board and give 10 to 12 kneads. Pat dough into a round 1 to 1 1/2 inch thick. Cut round into 6 or 8 wedges. Place wedges on baking sheet lined with parchment. Beat egg white until frothy and brush over tops of wedges. Sprinkle with sugar and bake for about 12 minutes or until medium brown on top.

To make smaller scones cut dough ball in half and pat each half into a round about an inch thick, then cut into wedges.

The scones you see in the picture were made from a recipe and a half of the dough. I usually spread them liberally with butter and homemade jam and that means they need to hold up. My mother makes the best jams and jellies I've ever had, a teaspoon or two just isn't enough.

Oh, and sorry for the post title, I was watching NCIS while I wrote this. Gibbs makes my heart pitter-patter.