Monday, August 16, 2010

Hummus


I remember before I had actually tried hummus thinking that it looked so delicious and smelled so good that it couldn't be anything else. Well, the first time I tried commercial hummus I was very disappointed. It was so sour that my mouth was unhappy and the wonderful garlic smell didn't translate to a wonderful garlic taste. So I developed a recipe with a lot less lemon juice and a lot more garlic. And now my mouth is happy.

Hummus
2 - 14.5 ounce cans garbanzo beans, drained, liquid reserved
1/2 - 3/4 cup tahini
3 tablespoons minced garlic
1/4 cup olive oil
juice of 1/2 lemon
sea salt, to taste

Puree garbanzo beans in a food processor or blender with a little of the reserved liquid until smooth. Add in tahini, garlic, lemon juice and salt. Process until well incorporated. With food processor running slowly pour in olive oil. Taste for seasoning and adjust if needed.

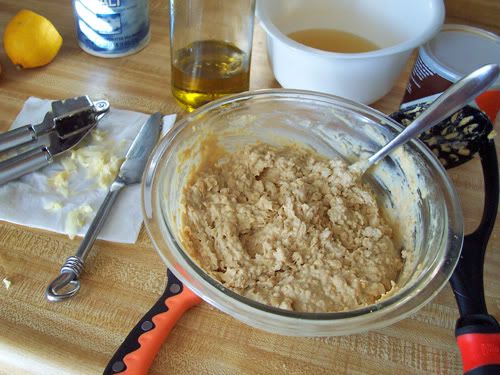
And that's how I would have made it if my blender had not frizzed on me. As you can see by the photo, I ended up using my potato smasher and a fork to do the work of the blender. This obviously made a more chunky hummus, but it still tasted great. The recipe above is also just the base that I use. While it is a very traditional hummus, I prefer mine very creamy so I add sour cream and cream cheese...and more olive oil. While it won't garner any brownie points with people who love real hummus, it's so fabulous on pita or bagel chips it's almost a sin.

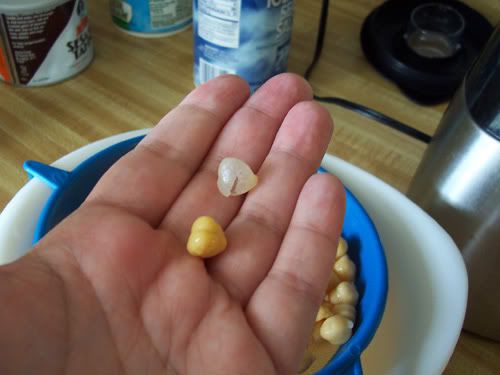
On a side note: garbanzo beans, whether canned or rehydrated from dry, have a tough casing on them that I don't care for in my finished hummus. I remove it very easily by just popping the bean out of it. A tedious job it may be, but a smoother product it will yield.

Saturday, August 14, 2010

I Am A Cheesewhore


Every Sunday my best friend and I meet up at the university library to work on our on-going book project. The library has these really great rooms on the 5th floor that bring in a lot of light, have large tables, comfortable chairs and even one with a pc. If we're having a particularly good session we can end up staying for 3+ hours. Working our creative brains for that long means we get hungry....really hungry. Since we're allowed to bring food and drinks into the library, we usually bring special "snacks", alternating Sundays.

Last Sunday I brought in green onion cream cheese with everything bagels, among other things. Since I have yet to attempt bagels from scratch, I made the cream cheese. And it was insanely easy. The best part, though, was that after I mixed it all together and it mellowed for a few hours, it tasted really close to a mixture of pepper and garlic-herb Boursin. Oh happy days for the cheesewhore.

Green Onion Cream Cheese
8 ounces cream cheese, room temperature
2 green onions, thinly sliced
1 teaspoon freshly minced garlic
1/2 - 1 teaspoon freshly ground black pepper, to taste
1/4 teaspoon salt

Mix all ingredients together in a small bowl, cover with plastic wrap and refrigerate for at least 3 hours, but over night is best. Take out about an hour before you want to serve so that it comes back to room temperature.

Friday, August 13, 2010

You Don't Call, You Don't Write...


It's been a while, but sometimes life will intrude on the things you want to do in your spare time. Well, I'm back now and with a super delicious recipe to warm you up. Ok, that's probably not what you want at this time of year in the Northern hemisphere, but that's what you get...deal with it.

When we lived in Washington state just outside of Tacoma, my sister introduced me to this little bitty place called Bangkok Thai....and therein we did have some of the best Thai food we've ever had. It was so good, it became our guilty pleasure. And while they had quite an extensive menu of delectable treats, she always ordered the Pad Thai and I always ordered the Red Curry Chicken, which we would share because the portion sizes were family style. We'd also share an order of Thai Spring Rolls, but I can't talk about them now because this isn't that kind of blog.

I haven't had either dish at any other Thai place that I liked better. However, I have tried a few times to make Red Curry Chicken that tasted close to it....and last week I finally succeeded. There were shouts of joy and a few tears were shed. Just to note before you even get started on this one, you can adjust the amount of the red curry paste that you add. Adding the full amount I listed is akin to number 3 or 4 on a Thai restaurant's "How Badly Do You Want To Burn Your Mouth" o'meter.

Red Curry Chicken
3 chicken breast halves, very thinly sliced
1 medium bell pepper, julienned
2 carrots, very thinly sliced
1 cup fresh green beans, trimmed
1 - 8 ounce can bamboo shoots, drained
4 - 13.5 ounce cans coconut milk
1 - 4 0unce can red curry paste (I use Maesri brand)
2 tablespoons canola oil
chilli paste with sweet basil leaves (optional)

In a small stock pot heat the oil and fry the curry paste for about 3 minutes. Add the carrots and cook for about 2 minutes more. Add the green beans and cook for about 2 minutes more. Add the bell pepper and cook for about 3 minutes. Add the coconut milk and stir to combine. Add the chicken breasts and bamboo shoots, cover and simmer until chicken is cooked through. Stir in chilli paste to taste or, if you can find it, about 2 tablespoons of Thai basil. Serve over jasmine rice.

Tuesday, June 8, 2010

Pork Love

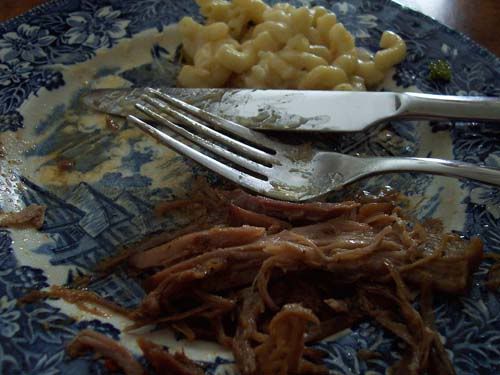
What you see above is the remains of the pulled pork, macaroni and cheese, and broccoli meal I made the other night. I *may* have forgotten about pictures until we were all sitting around being fat. It was so tasty, we really didn't think about anything else outside of "where's my fork?".

Now, pulled pork is probably a misnomer for what I made, but I've always called it that and I'm not going to stop now. It's kind of like my sister and I calling Nitzer Ebb Nitzer with a short i instead of a long i as we found out it was actually pronounced years later. It's still Nitzer with a short i to us...and what I make is still pulled pork to me no matter that it's technically slow cooked pork.

Pulled pork is extremely easy to make and can be taste customized to the extreme. All you need is a nice piece of pork shoulder, an assortment of herbs and spices, and an oven. For the pork I made I used a 10 pound bone-in pork shoulder, which is actually pretty large. You can certainly use a smaller one, but make sure that it is bone-in for the best flavour. Let your pork sit out until it's room temperature. Then pre-heat the oven to 275 degrees. Mix together the herbs and spices of your choice, along with salt, and rub and press this mixture all over the pork shoulder. Place the pork in a large baking dish, cover tightly with foil and place in the oven. Let the pork cook, depending on weight, anywhere from 4 to 6 hours. You will know it is done when it is so tender, it pulls apart easily with a fork. Allow pork to cool for a few hours, then pull apart with either forks or your hands. There will be a fair amount of juice in the bottom of the baking dish that can either be poured over the pulled pork or used as a base for homemade barbecue sauce. I poured it over the pork because not everyone likes barbecue sauce in my house. Use the pork for sandwiches or serve as is with the side dishes of your choice.

The mixture I used on my pork contained the following:
kosher salt
freshly ground black pepper
rubbed sage
sweet Hungarian paprika
garlic powder
ground coriander
ground ginger
crushed red pepper flakes
light brown sugar

The macaroni and cheese was homemade as well. It was amazing and quite simple.
1 pound uncooked elbow macaroni
3-4 cups bechamel sauce
2 cloves garlic, crushed
8 ounces extra sharp Vermont white cheddar, shredded
8 ounces Havarti, shredded

Heat bechamel sauce over medium heat until simmering. Stir in the garlic. Slowly whisk in the shredded cheeses by the handful until each is melted and blended in. Turn off heat half way through. Boil macaroni until al dente, drain and add back to the pot. Pour cheese sauce over macaroni and fold in. Serve immediately. My kids are spoiled for mac and cheese now.

Saturday, June 5, 2010

Insane, Now With More Mount

There are some sweet benefits to working on Insane. One of those is Baron Rivendare's Deathcharger. See, part of working on the title requires that you pick up Frayed Abomination Stitchings, which are soulbound (they are bound to the character that loots them), because they are part of the mats needed for Libram of Protection turn ins for Shendra'lar rep (say that three times fast). These things only drop in Old Stratholme and only off of the abominations in front of Baron Rivendare's quarters. Back in the old days it was kind of difficult to get to Baron before the 45 minute timer ran out and he skiddadled. Nowadays at level 80 you can one-man the instance and, even if you kill all the mobs and other bosses, make it to Baron with time to spare. Which is fantastic because one of the things that can drop off of him is his deathcharger. Granted, it only has a 1% drop rate, but when you compare that to other rare mounts in the game, that's pretty damn good. And I got it last week. It was a bittersweet moment since I was elated for myself and sad for Gaz and Bluey who have been farming for this mount since they ran Stratholme back in Vanilla.

Bloodsail Buccaneers: Honored (this one is still done)
Darkmoon Faire: Friendly (can't work on this one again until next tomorrow)
Ravenholdt: Friendly (haven't worked on this one for a while)
Shen'dralar: Revered (1500/21000)
Booty Bay: Hostile (710/3000)
Everlook: Hostile (710/3000)
Gadgetzan: Honored (7557/12000)
Ratchet: Hostile (973/3000)

Sunday, May 30, 2010

It's called a lance, hello!

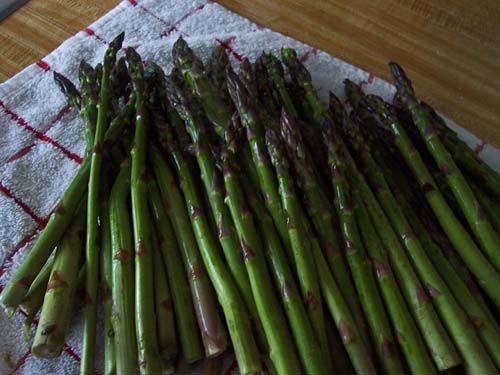
I love asparagus and if you ask me, it gets a really bad rap. But I can kind of understand why. For the most part people are introduced to it via canned vegetables *shiver*, which means that they get mushy, greyish "spears" that taste like ass. Fresh asparagus is a complete 180; snappy, vibrantly green and succulent.

About a month and a half ago, I bought three pounds of asparagus and wasn't sure what I wanted to do with it. I really didn't feel like Hollandaising it or dousing it with any other heavy sauce. Luckily, I was on the phone with my mom gushing over my fabulous purchase and she gave me told me what to do.

Photobucket

Sauteed Asparagus
2 lbs cleaned and snapped aparagus
2 tbs olive oil
2 tbs unsalted butter
kosher salt
freshly ground black pepper
zest from one lemon (optional)
juice from 1/4 lemon (optional)

In a wide pan over medium heat melt the butter with the olive oil. Add in the asparagus a single layer at a time, adding salt and pepper to taste. When all the asparagus is in the pan use tongs or two spatulas to move the spears around so that they all get coated. Saute spears for about 15 minutes, rotating frequently. Remove from heat, add in zest and juice, and gently toss to distribute. Serve immediately.

And yes, my stove really is THAT small.

Not sure how to snap asparagus? Join my daughter's hands...

Thursday, May 27, 2010

Beef, It's What's For Dinner

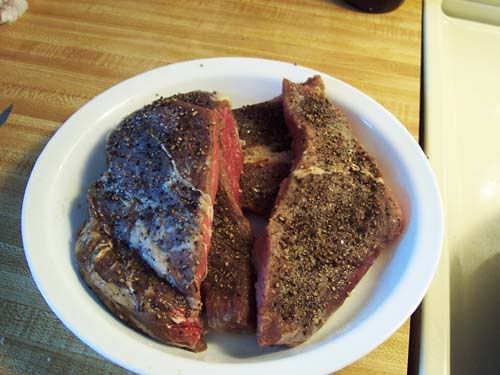
Cooking steak intimidates me. It always has. I think it's because I can't grill or barbecue to save my life. I've tried pan frying and broiling before, always with lackluster results. But with the meat bundle I bought from Jaworski's I got some really, really nice Angus steaks like the ones you see above; sirloin tip. And I couldn't just let them sit around...I mean look at them! They're beautiful! And I couldn't get the image of Gibbs and Shepard eating steak au poivre out of my head (I really do watch too much NCIS). So I brought out one of my French cookbooks to see how this wonderful sounding meat was made.

To say that it was simple is an understatement and as long as you have a good piece of beef, your taste buds will sing "happy, happy, joy, joy".

Steak Au Poirve
4 - 1 1/2 inch thick steaks
4 tbs unsalted butter
2 tbs olive oil
1/4 medium onion, finely diced
1/4 cup semi-dry white wine
kosher salt
cracked black pepper

Make sure to let your steak sit out of the fridge for about an hour before doing anything with it. I set mine on paper towels to make sure that any excess moisture would be wicked away. Sprinkle kosher salt lightly on one side of the steak, then sprinkle that side generously with cracked black pepper and press it into the steak firmly with your hand. Repeat on reverse side. Melt 2 tablespoons of butter in a heavy bottomed saute pan with the olive oil over medium-high heat. When oil and butter are shimmering add two of the steaks to the pan. Sear steaks without turning for 3 to 4 minutes (for medium rare). Turn and sear on opposite side for 3 to 4 minutes. Remove to a heated plate and put in a warm oven while searing the remaining steaks. Lower heat to medium and add the finely diced onions to the pan. Saute until onions begin to turn translucent. add wine and deglaze pan. Taste for salt and add if needed. Turn off heat, add remaining 2 tablespoons of butter to the pan and swirl to incorporate. Spoon sauce over steak and serve immediately.


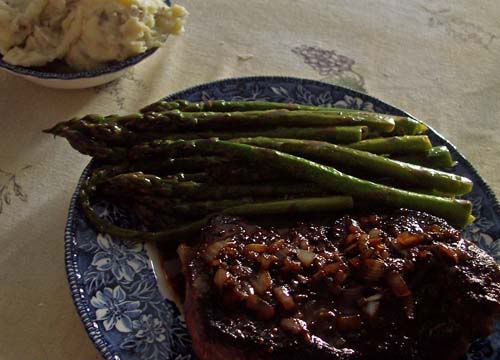
I served my steak with sauteed asparagus and mashed potatoes. There was a general cry of joy as we all dug into our steaks and then we all sort of fell into a beef coma. That coupled with losing daylight made for a dark picture. Tomorrow I'll show you the asparagus. God, I love asparagus.